Bicycle maintenance guide: How to look after your bike over winter
Bicycle maintenance guide: How to look after your bike over winter
Posted on 15 Jan 2018
Regular checks (and cleaning!) are a must throughout the year, but even more so during the winter!
Whether you're a road cyclist or a trail cyclist, winter takes its toll on your bike if not looked after properly. Dirt, grit, salt and even snow all conspire to spoil your winter riding.
Regular ‘preventative' maintenance during the wet months will help keep your bike running smoothly throughout, so Pete-one of the original pioneers of Cytech training and a trainer/assessor at pjcsonline.co.uk (PJCS)-is here to show you a few things to keep on top of.
Wheels
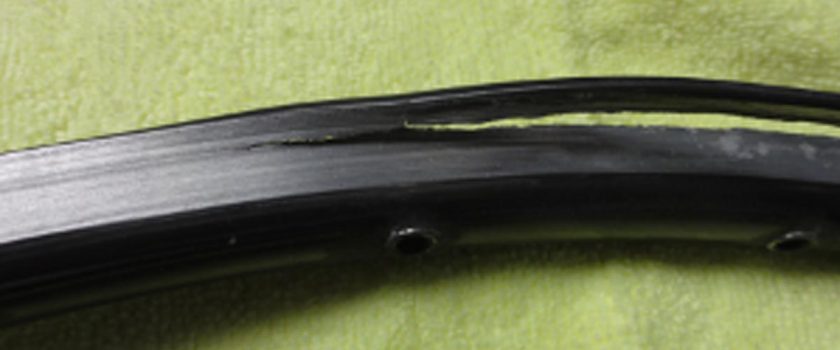
It's important to regularly clean the rim of your wheels and inspect for any damage that may occur due to potholes, for example. For bikes with rim brakes, you should also inspect the wear and tear on the braking surface (as well as the brake pads themselves) which are subject to heavier wear rates during the winter months. Most modern rims have some form a wear indicator-if this is no longer visible then it is time to consider replacement to avoid a catastrophic failure of the rim if neglected for too long. For more information on brake pads check our previous articles in the bicycle maintenance series.
Whilst in this area of the bike it's also best to check the condition of your tyres which, like most bicycle components, wear over time. They should be inspected for cuts, cracks and splits in the tread or sidewall, as well as any other damage or debris stuck in the tyre that may cause the tyre to fail prematurely and lead to a puncture/deflation. Replacing the tyre (if necessary) at home is much easier than out on the road or trail!
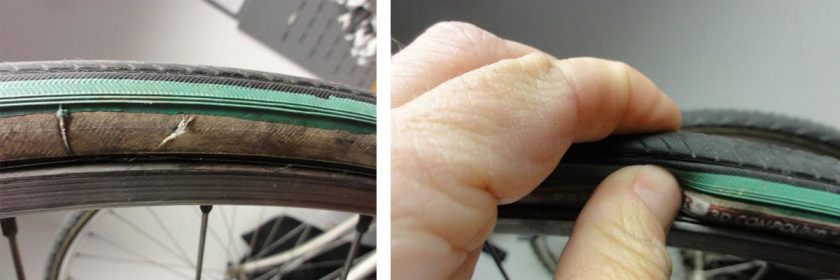
Checking your tyres
If riding tubeless you will need to continue regularly checking fluid levels and top up if necessary-there are brands/tools out there that allow you to be able to do this without ‘popping' the bead, making the whole process less hassle.
Drivetrain
This time of year is particularly heavy on the drivetrain components such as the chain, cassette, chainrings and derailleurs, so spending some time on keeping these cleaned and lubricated will reduce the wear and tear of these items to the minimum.
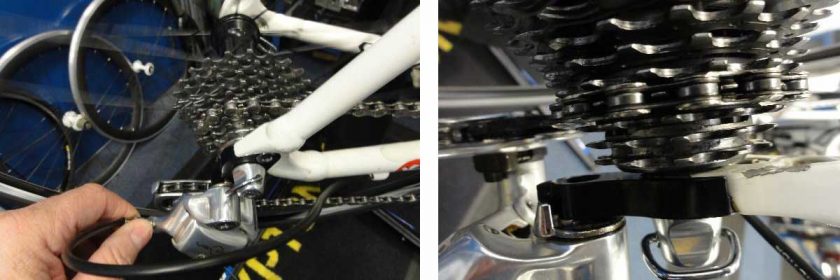
Unless you use a power/quick-link or variant, the chain should be cleaned in situ as ‘breaking' and refitting it by the more traditional methods can add another potential weakness to the chain. There are a number of products available to aid in cleaning your chain in situ, which can be very useful, especially if you have disc brakes. As mentioned in our last article it's important not to contaminate your disc pads, so removing them and the wheel is sensible when cleaning. With the wheel removed, a ‘dummy hub' comes in very handy to keep the chain ‘in place'.
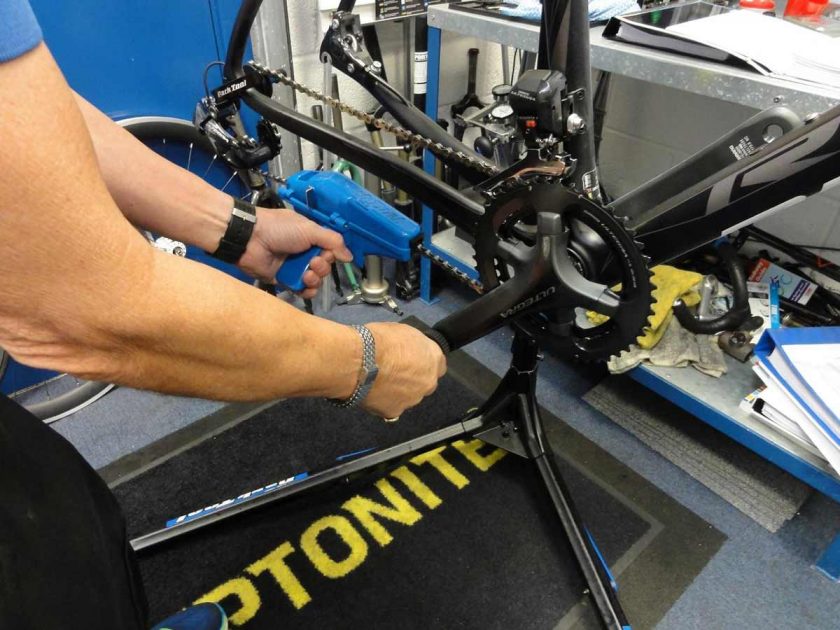
Using a dummy hub and a chain cleaning tool
This process of a thorough clean should be a monthly task and, over the winter period, it's also a good idea to have an additional quick clean and re-lube after every ride, which will help reduce chain wear considerably.
Moving onto the rest of the drivetrain the cassette should be removed and soaked in de-greaser at least monthly and then re-fitted. No additional lubrication required on this item due to transfer from the lubricated chain.
Front and rear derailleurs should be cleaned regularly as well, ensuring that all linkages are thoroughly lubricated by working them through both extremes of travel with fresh lube.
The chainrings should also be wiped clean regularly to keep the levels of dirt and grit to the minimum.
Having cleaned and re-lubricated the drive train, it's a good time to check gear adjustment, and fine tune if necessary, as clunking gears can also increase the wear rate on these components.
Checking gear adjustment
Below are the processes of properly checking whether your gears are set up correctly;
Standard Rear Derailleur
1. Check that the derailleur is fixed properly to the frame, and tighten if not.
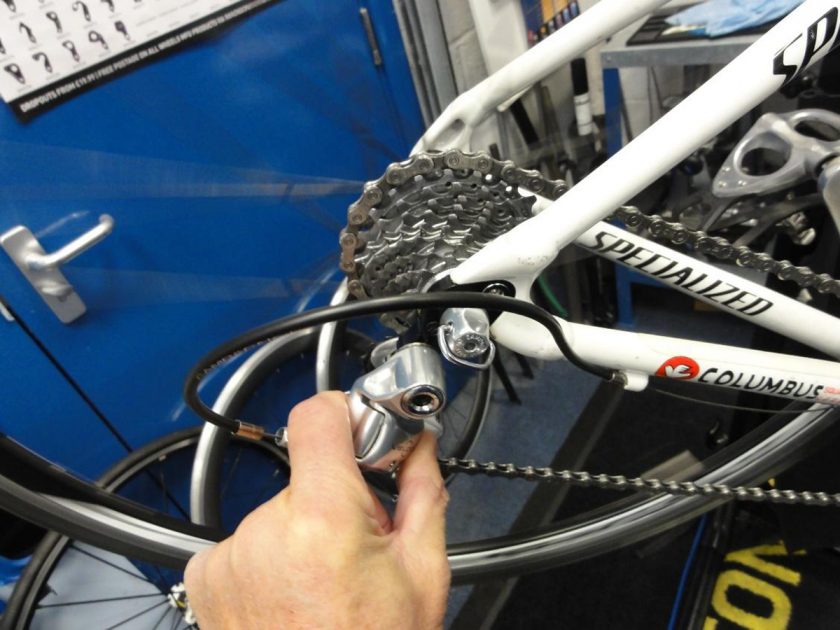
2. ‘Disengage' the cable. To do this shift you bike into first gear (biggest sprocket) whilst turning the pedals. Then, without turning the pedals, use the lever to shift into your highest gear (i.e. without the chain actually changing gears) to release the cable tension. With the cable tension reduced bring the cable out of the guide (as pictured below), and then turn the pedals to let the chain shift onto the smallest sprocket.
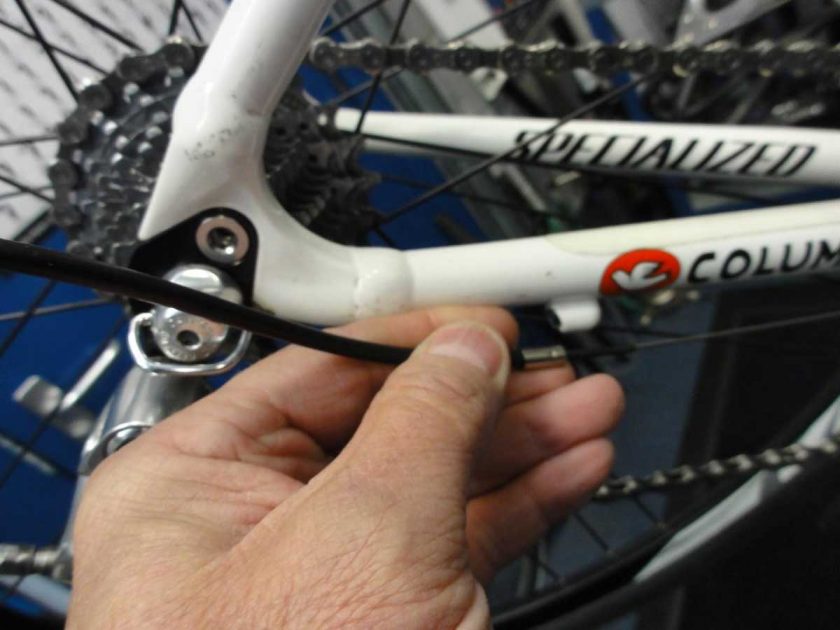
Disengaging the cable
3.With the chain on the highest gear (smallest sprocket), check that it runs smoothly. If not then use the High-End Stop Adjustment screw to adjust.
4. Now, whilst turning the pedals, manually (so without using the shifter) push the derailleur onto the lowest gear (biggest sprocket). Check that the chain runs smoothly in this gear, and if not then use the Low-End Stop Adjustment screw to adjust.
5. Whilst still pushing the derailleur onto the lowest gear, re-engage the cable. Continuing to pedal, let the derailleur go so that it returns itself to the highest gear.
6. Using the shifter, shift to the 2nd highest gear (so 10th gear on an 11-speed sprocket, 9th on a 10 speed etc.) (for Campagnolo gears you want 7th on 10 and 11-speed sprockets). Whilst pedalling forwards increase cable tension using the micro adjuster until the chain starts to ‘chatter' against the side of the third sprocket in, and then reduce cable tension until the ‘chatter' stops. This should result in fully adjusted gears.
7. Run through the gears in both directions. If it does ‘snag' in either direction, return to the highest gear (smallest sprocket), then shift down one click (or to gear 7 for Campagnolo). Micro adjust 1 notch in either direction. Repeat until you get smooth shifting in both directions.
Front Derailleur
The front derailleur can seem a little trickier to get the hang of, so may be worth seeking some hands-on advice (or booking yourself onto one of our Home mechanic courses!).
1. Check that the height/orientation of the derailleur is OK, and also that the derailleur is fixed properly to the frame.
2. Shift the chain onto the smallest chain ring (at the front) and the largest sprocket (at the back).
3. Either disengage the cable similar to the rear, or slacken the cable using the tension adjuster (remembering how many turns you've adjusted it by).
4. You can now check if the chain runs smoothly on the small chainring and if not use the Low-End Stop Adjustment screw to adjust.
5. Reintroduce/retighten the cable and shift into the largest chainring and smallest sprocket.
6. Check if the chain runs smoothly on the large chainring and if not use the High-End Stop Adjustment screw to adjust.
7. Now shift through the gears to make sure they all run smoothly, and if not make small adjustments to the cable tension to fine tune.
If in doubt with either of these processes you can always consult your nearest Cytech qualified mechanic!
Finally...
It can't be said enough that a clean bike is a happy bike! During the winter it's even more important that you regularly wash the whole bike using warm soapy water and soft brush to prevent heavy build-up of dirt and mud etc., and rinse off with cold water. Make sure to wipe down and dry the bike and, for extra protection, it's recommended that you apply polish to the frame to help prevent the corrosive elements attacking your paintwork.
Now you're bike's ready for the winter rides, all that's left is to make sure you've wrapped up warm in order to go out and enjoy them!