Bicycle maintenance guide: How to tape your handlebars
Bicycle maintenance guide: How to tape your handlebars
Posted on 14 Feb 2018
Changing the handlebar tape on your road bike is a really easy way to give your bike a fresh new look.
 Let's face it, most of us leave this job for too long and at this time of year the salted roads and damp weather conditions all conspire to turn your once clean white bar tape into a muddy brown coloured soggy mess. Even if you shun the outdoors to train indoors on the likes of Zwift your bar tape is not immune-salt marks from an (invariably copious amount) of sweat will leave white rings on your tape-especially if it's black.
Changing the tape and re-taping is not a long or difficult job-it should take you around twenty minutes to complete, though the perfectionists among you may want to leave a bit more time to complete the job! Jules, Cytech trainer and assessor for ATG Training, is here to guide you through the process.
Out with the old...
 To begin with, remove the old tape and degrease the handlebars, removing all traces of the old tape. We like to use a rapid drying degreaser such as Finish Line's Speed Bike Degreaser for this, however there are a whole range of products available to do the job.
If you need to reposition your brake/shift levers then now's the time. Start with levelling your handlebars-you're aiming for the top of the bar to be horizontal when viewed from the side. This is a job best done out of the work stand and we have leaned the bike up against a level workbench to use as a horizontal guide to line the top of the bar with when viewed from the side. You can level the levers on the bars by using the guide marks on the bars, but as a rule you want the base of the hood (where the lever joins the bar) to be level with the top of the bar. Again viewing the bike from the side out of the work stand is easiest.
You can check that both of the levers are at the same height by using the ‘broomstick trick' (you can use a spirit level for this but anything straight such as a bit of wooden dowel will do the job). Place the straight edge at the base of both of the hoods where they join the bars and view the bar from the front of the bike. You can use the position of the straight edge relative to the handlebar to position the levers until the straight edge is level with the bars.
Now before moving on WASH YOUR HANDS! Changing the tape after you've done an oily job like removing an old chain is a recipe for disaster (well grubby tape) especially if it's white!
... in with the new
Use a good quality electrical tape to pull the cables into the handlebar. If you run a lot of mounts on your bars (light brackets/camera mounts etc.) then you may consider putting the cables more underneath the bar to make access to the mount bolts easier. Make sure you pull the cables tightly into the corners of the bar-this will make road rim brakes feel sharper as the electrical tape holds the cables in place more stiffly than just relying on the bar tape itself to do the job.

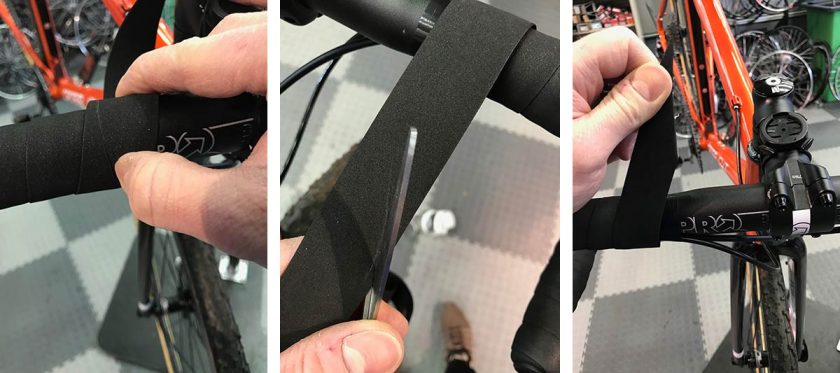
Start taping the bars from the bottom of the handlebars working up. Position the end of the tape so that it is half on and half off of the end of the bar and wrap the tape inwards (towards the stem) on both sides (this means counter-clockwise on the right-hand side and clockwise on the left, however either way does the job if the steps are followed!).


Purists will take pride in the ‘Figure of 8' method and it's considered by many Master technician bike mechanics to be the ‘proper' way. It's worth noting that some bar tapes change colour halfway through the wrap and can only be wrapped this way to get a straight split between the colours.
The ‘Cheat Strip' method is easier and if you've not taped bars before then we'd recommend this way if you're not overly confident.
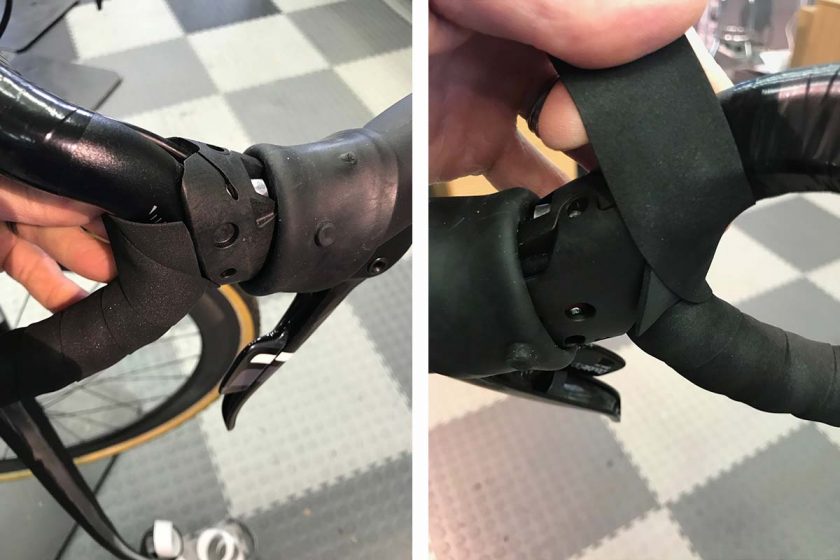
Figure of 8 method
Continue to wrap around the bar and when you reach the lever, wrap as close to the underside as you can before going:
- Behind the lever and then up and over the top of the lever.
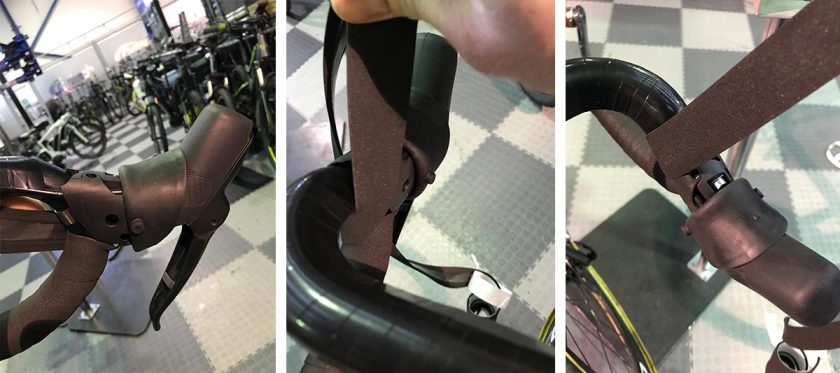
- Then bring it down and behind the lever again, following through to the front and under the lever.
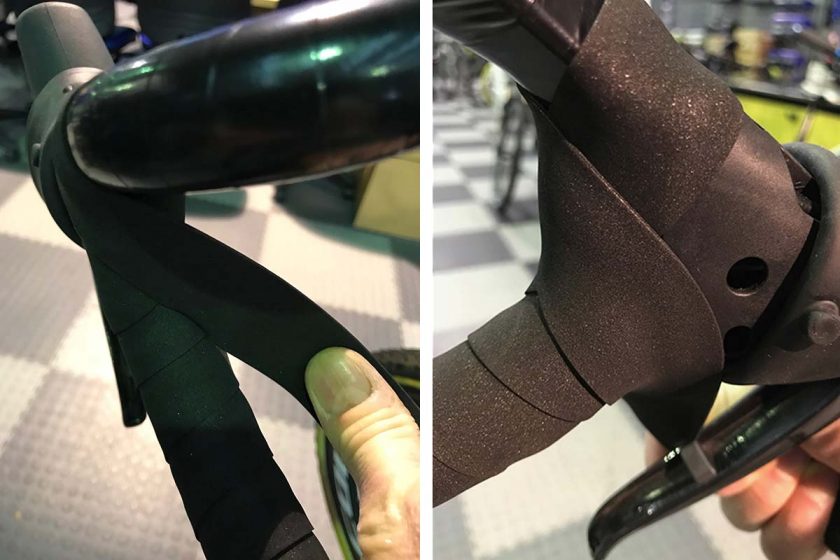
- Then bring it back behind the lever and up to the top of the bar to continue wrapping as before.
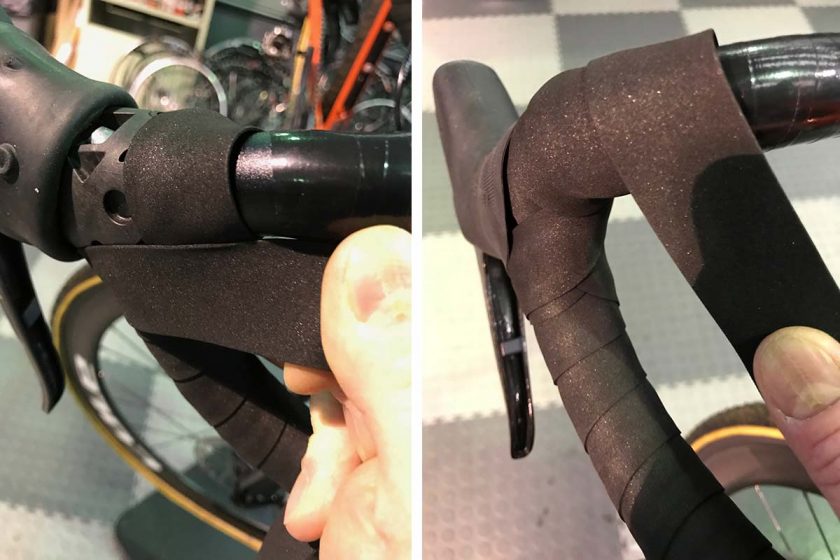
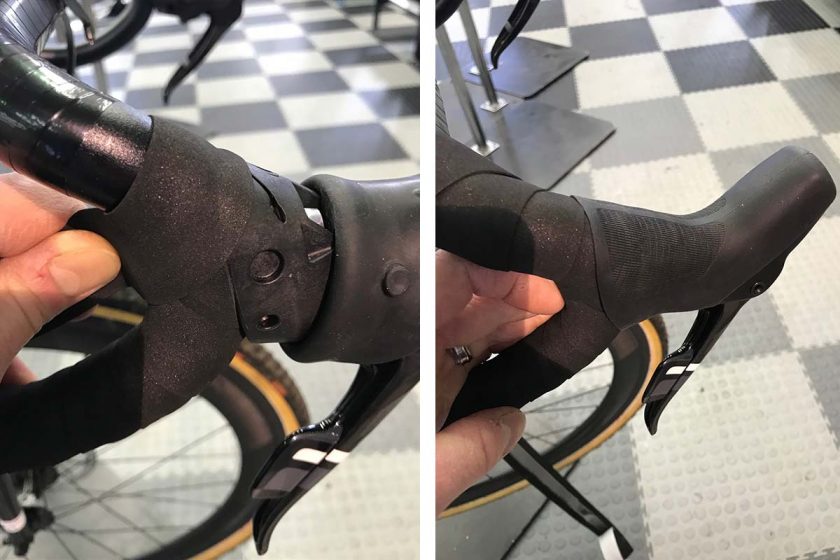
Cheat Strip method
Having fitted the end plug, now's the time to cut the cheat strip to size-sometimes this comes with the new tape, and sometimes you may need to cut your own. Remember that it shouldn't cover any points that the hood will lock into.
- Behind the lever and then up and over the top of the lever clamp.
- Then bring back under the handlebar to continue wrapping as before.
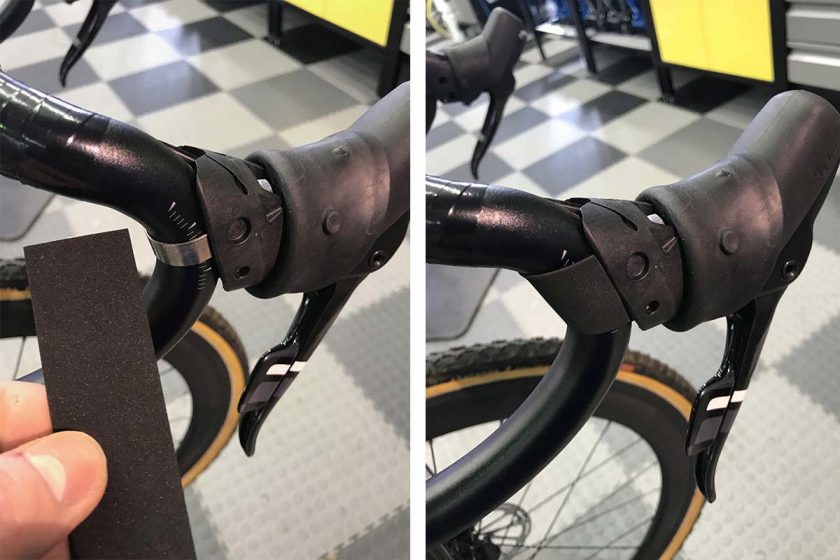
Finishing up
Pop the hoods back into place and ensure that the lever bracket is covered-you shouldn't see any of the handlebar through the grip. You may need to repeat the last step(s) of either method (with the cheat strip the strip may need repositioning) if there are gaps.
Continue to wrap the tape to the end of the bar. You are aiming to come towards the stem at a diagonal slant and finish at a flat cut parallel to the stem. Where you finish the tape is sometimes dictated by the bar shape itself (aero bars with their flat top for example) but largely it's a matter of personal preference. Here we decided to use a gap of three fingers either side of the stem which left the handlebar logo nicely on display. To cut the flat end to the tape, pick a finishing point (three fingers in our example) then continue to wrap over this point at an angle. Hold the tape in position and mark a flat line down the front of the handlebar from this finishing point. You can then unwrap the bars and use this diagonal line to cut the end of the tape.
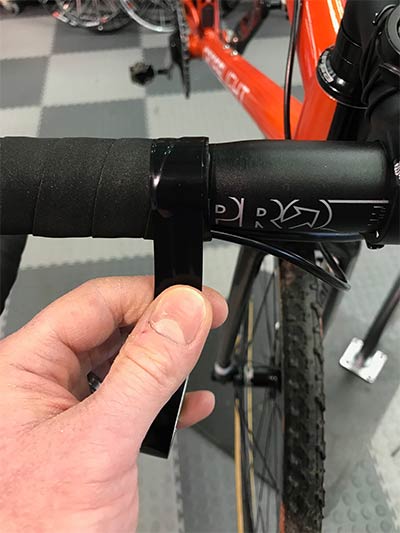
Finish the wrap with a nice wind of electrical tape. We've wound just over the tape itself here, but half on the tape / half on the bar is just as acceptable and may add a touch of waterproofing to the underneath of the tape.
As a guideline, we'd recommend replacing your tape yearly as if it's left for a long time it can harbour bacteria that can make you unwell. Really though you can change it anytime you fancy to keep your ride looking fresh, and if you ever need any help then be sure to get in touch with your local bike shop!